There are many javascript libraries that give a lot of functionality out of the box which we normally include with a <script src=”url”></script> in the header section of the HTML page. In this article, we explain a method to do use these libraries in SvelteJS components. In doing so we explore three features of Svelte that are not often written about: onMount, svelte-head, and global().
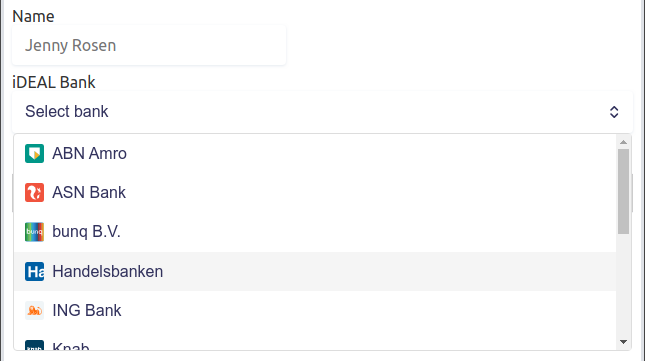
So as an example we build an integration with the Stripe.js library which allows the creation of components for online payments. First, we create a new component that should allow payments with iDEAL (more info). We take the code from the example given and then sveltify it.
The example
The original HTML code looks like this:
<script src="https://js.stripe.com/v3/"></script>

<form id="payment-form">
  <div class="form-row">
    <label for="name">
      Name
    </label>
    <input id="name" name="name" placeholder="Jenny Rosen" required>
  </div>

  <div class="form-row">
    <label for="ideal-bank-element">
      iDEAL Bank
    </label>
    <div id="ideal-bank-element">
      <!-- A Stripe Element will be inserted here. -->
    </div>
  </div>

  <button>Submit Payment</button>

  <!-- Used to display form errors. -->
    <div id="error-message" role="alert"></div>
</form>
It contains quite a bit of lines of Javascript code that uses the included script https://js.stripe.com/v3. The script will look for Stripe elements and creates Stripe specific HTML to load the bank details.
// Create a Stripe client.
// Note: this merchant has been set up for demo purposes.
var stripe = Stripe('pk_test_6pRNASCoBOKtIshFeQd4XMUh');

// Create an instance of Elements.
var elements = stripe.elements();

// Custom styling can be passed to options when creating an Element.
// (Note that this demo uses a wider set of styles than the guide below.)
var style = {
  base: {
    padding: '10px 12px',
    color: '#32325d',
    fontFamily: '-apple-system, BlinkMacSystemFont, "Segoe UI", Roboto, Helvetica, Arial, sans-serif',
    fontSmoothing: 'antialiased',
    fontSize: '16px',
    '::placeholder': {
      color: '#aab7c4'
    },
  },
  invalid: {
    color: '#fa755a',
  }
};

// Create an instance of the idealBank Element.
var idealBank = elements.create('idealBank', {style: style});

// Add an instance of the idealBank Element into the `ideal-bank-element` <div>.
idealBank.mount('#ideal-bank-element');
... 67 more lines
And it has some CSS styling
input, .StripeElement {
  height: 40px;

  color: #32325d;
  background-color: white;
  border: 1px solid transparent;
  border-radius: 4px;

  box-shadow: 0 1px 3px 0 #e6ebf1;
  -webkit-transition: box-shadow 150ms ease;
  transition: box-shadow 150ms ease;
}

input {
  padding: 10px 12px;
}

input:focus,
.StripeElement--focus {
  box-shadow: 0 1px 3px 0 #cfd7df;
}

.StripeElement--invalid {
  border-color: #fa755a;
}

.StripeElement--webkit-autofill {
  background-color: #fefde5 !important;
}
So, lets sveltify it.
HTML and the Svelte script
First, we add the HTML in a Stripe.svelte component and we include the script with <svelte:head>. Furthermore, we add the on:load binding to a function that will notify us when the external javascript is ready. With Sapper, we can skip this step but it seems that the sveltejs/template needs the extra check.
<svelte:head>
  <script src="https://js.stripe.com/v3/" on:load={stripeLoaded}{></script>
<svelte:head>

<form id="payment-form">
... rest of the HTML
To include the script in Svelte we will need to use the onMount feature which allows us to run javascript code after the HTML elements have been loaded.
<script>
	import { onMount } from 'svelte';
        let stripeReady = false;
        let mounted = false;

        onMount(() => {
            // The payment-form is ready.
            mounted = true;
            if (stripeReady) {
                loadStripeElements();
            }
        });

        function stripeLoaded() {
            // The external Stripe javascript is ready.
            stripeReady = true;
            if (mounted) {
                loadStripeElements();
            }
        }

        function loadStripeElements() {
            // Time for Stripe.js to do its magic.
            const stripe = tripe('pk_test_6pRNASCoBOKtIshFeQd4XMUh');
            var elements = stripe.elements();
            // etc..
        }
    }

</script>

... Svelte head and HTML
Styling
Next up is the styling. Because Svelte uses a compiler and the Stripe HTML is generated after the client has loaded the component most of the styling will not apply if we just add it in the style section of the .svelte component. We can use the global() function to compile the specified CSS the way it is written. To avoid unintended consequences in other components you can best specify it to an id specific to your component. (in our case the #payment-form):
<style>
#payment-form :global(input, .StripeElement) {
  height: 40px;

  color: #32325d;
  background-color: white;
  border: 1px solid transparent;
  border-radius: 4px;

  box-shadow: 0 1px 3px 0 #e6ebf1;
  -webkit-transition: box-shadow 150ms ease;
  transition: box-shadow 150ms ease;
}

#payment-form :global(input) {
  padding: 10px 12px;
}

#payment-form :global(input:focus, .StripeElement--focus) {
  box-shadow: 0 1px 3px 0 #cfd7df;
}

#payment-form :global(.StripeElement--invalid) {
  border-color: #fa755a;
}
#payment-form :global(button) {
  height: 40px;
  width: 100%;
  margin-top: 40px;
  background: #32325d;
  color: #fff;
  font-weight: 600;
}
</style>
Full component
That is it, the Stripe.js library is used in a svelte component. The full code can be seen in this REPL, unfortunately, Stripe.js does not work in the REPL because of CORS security in Stripe. However, you can download a ZIP file from the REPL and it should work when you run: npm install and npm run dev.

Some final notes
- Note that this method only should be applied to client-side javascript libraries. For server-side libraries in Sapper you can use npm with Rollup.
- With Rollup It seems theoretically possible to pick and choose what javascript to package during compile-time and serve that to the users instead. However, there are good reasons not to do this. For example, when the external libraries have a critical security update we need to compile first before the users will get the update.
- This method will not work with SSR pages since the onMount is only called on the client-side.
- If you liked this article please consider to
Buy me a coffee (Thanks for the kind donors of the previous coffees!)
- Cover photo by Ricardo Gomez Angel


1 Comment
mojoheadz · January 12, 2022 at 8:47 pm
I am delighted!!